Quick Start Guide
Get started with AgenticAnts and start monitoring your AI agents. Choose your preferred integration method below.
Want to learn more? Watch How to Set Up the ANTS Platform: AI Agent Tracing, Slack/Jira Integrations & Full LLMOps Walkthrough
Prerequisites
Before you begin, ensure you have:
- A modern web browser
- Node.js 20+ or Python 3.9+ installed
- An existing AI agent or application (or follow along with our example)
Step 1: Create Your Account
- Visit agenticants.ai
- Click "Contact Sales" or "Get Started"
- Fill out the contact form with your details
- You'll receive an email with your account credentials
Free Trial Available: Start with our free trial - 50,000 credits for 30 days, no credit card required.
Step 2: Set Up Your Organization and Project
After creating your account, you'll be guided through a quick setup process to configure your organization and project:
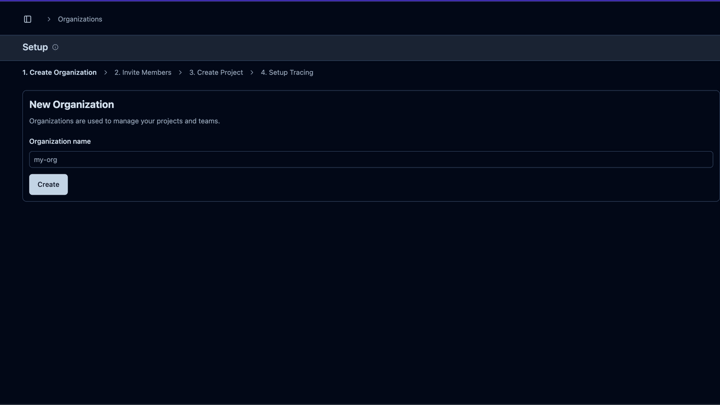
The setup workflow includes:
- Create Your Organization - Enter your organization name (e.g., "Acme Corporation")
- Invite Team Members - Add team members by email and assign roles (Admin, Member, Viewer). You can skip this and invite members later from Organization Settings
- Create Your First Project - Set up a project with a name and description. Select which team members should have access
- Add Payment Method - Optional step for continued usage beyond the free trial. Powered by Stripe for secure payment processing. Your free trial includes 50,000 credits for 30 days with no credit card required
- Setup Tracing - Get your API keys to start integrating AgenticAnts into your applications
Setup Complete! Your organization and project are now ready. You can now proceed to get your API credentials.
Step 3: Get Your Credentials
Once logged in:
- Navigate to Settings → API Keys
- Find your Public Key and Secret Key
- Copy both keys and store them securely
Keep Your Keys Secret: Never commit your keys to version control or share them publicly. The secret key provides full access to your account.
Choose Your Integration Method
AgenticAnts offers two integration approaches. Choose based on your needs:
- ~10 lines of code
- Automatic LLM tracing
- Zero changes to existing code
- Captures all LLM calls automatically
- Full control over traces
- Custom spans and metadata
- Error handling patterns
- You decide what to trace
Option A: Auto-Instrumentation (2 Minutes)
Use OpenLLMetry to automatically capture all LLM calls with zero code changes to your existing application.
Supported Providers: OpenAI, Anthropic (Claude), AWS Bedrock, Azure OpenAI, Google Vertex AI, Gemini, Cohere, Mistral, Groq, LangChain, LlamaIndex, and more.
Language Support: Auto-instrumentation is available for Python and JavaScript/TypeScript only.
Step 4A: Install Dependencies
Step 5A: Initialize Auto-Instrumentation
Add this setup code once at the start of your application (before any LLM calls):
Step 6A: Use Your LLM (No Changes Needed)
Your existing LLM code works as-is. All calls are automatically traced:
Now skip to Step 7: View Your Data to see your traces!
Option B: Full SDK (15 Minutes)
Use the AgenticAnts SDK for full control over your traces with custom spans, metadata, and error handling.
Step 4B: Install the SDK
Choose your preferred programming language:
Step 5B: Initialize AgenticAnts
Set up AgenticAnts in your application:
Step 6B: Instrument Your First Agent
Now let's add monitoring to an AI agent:
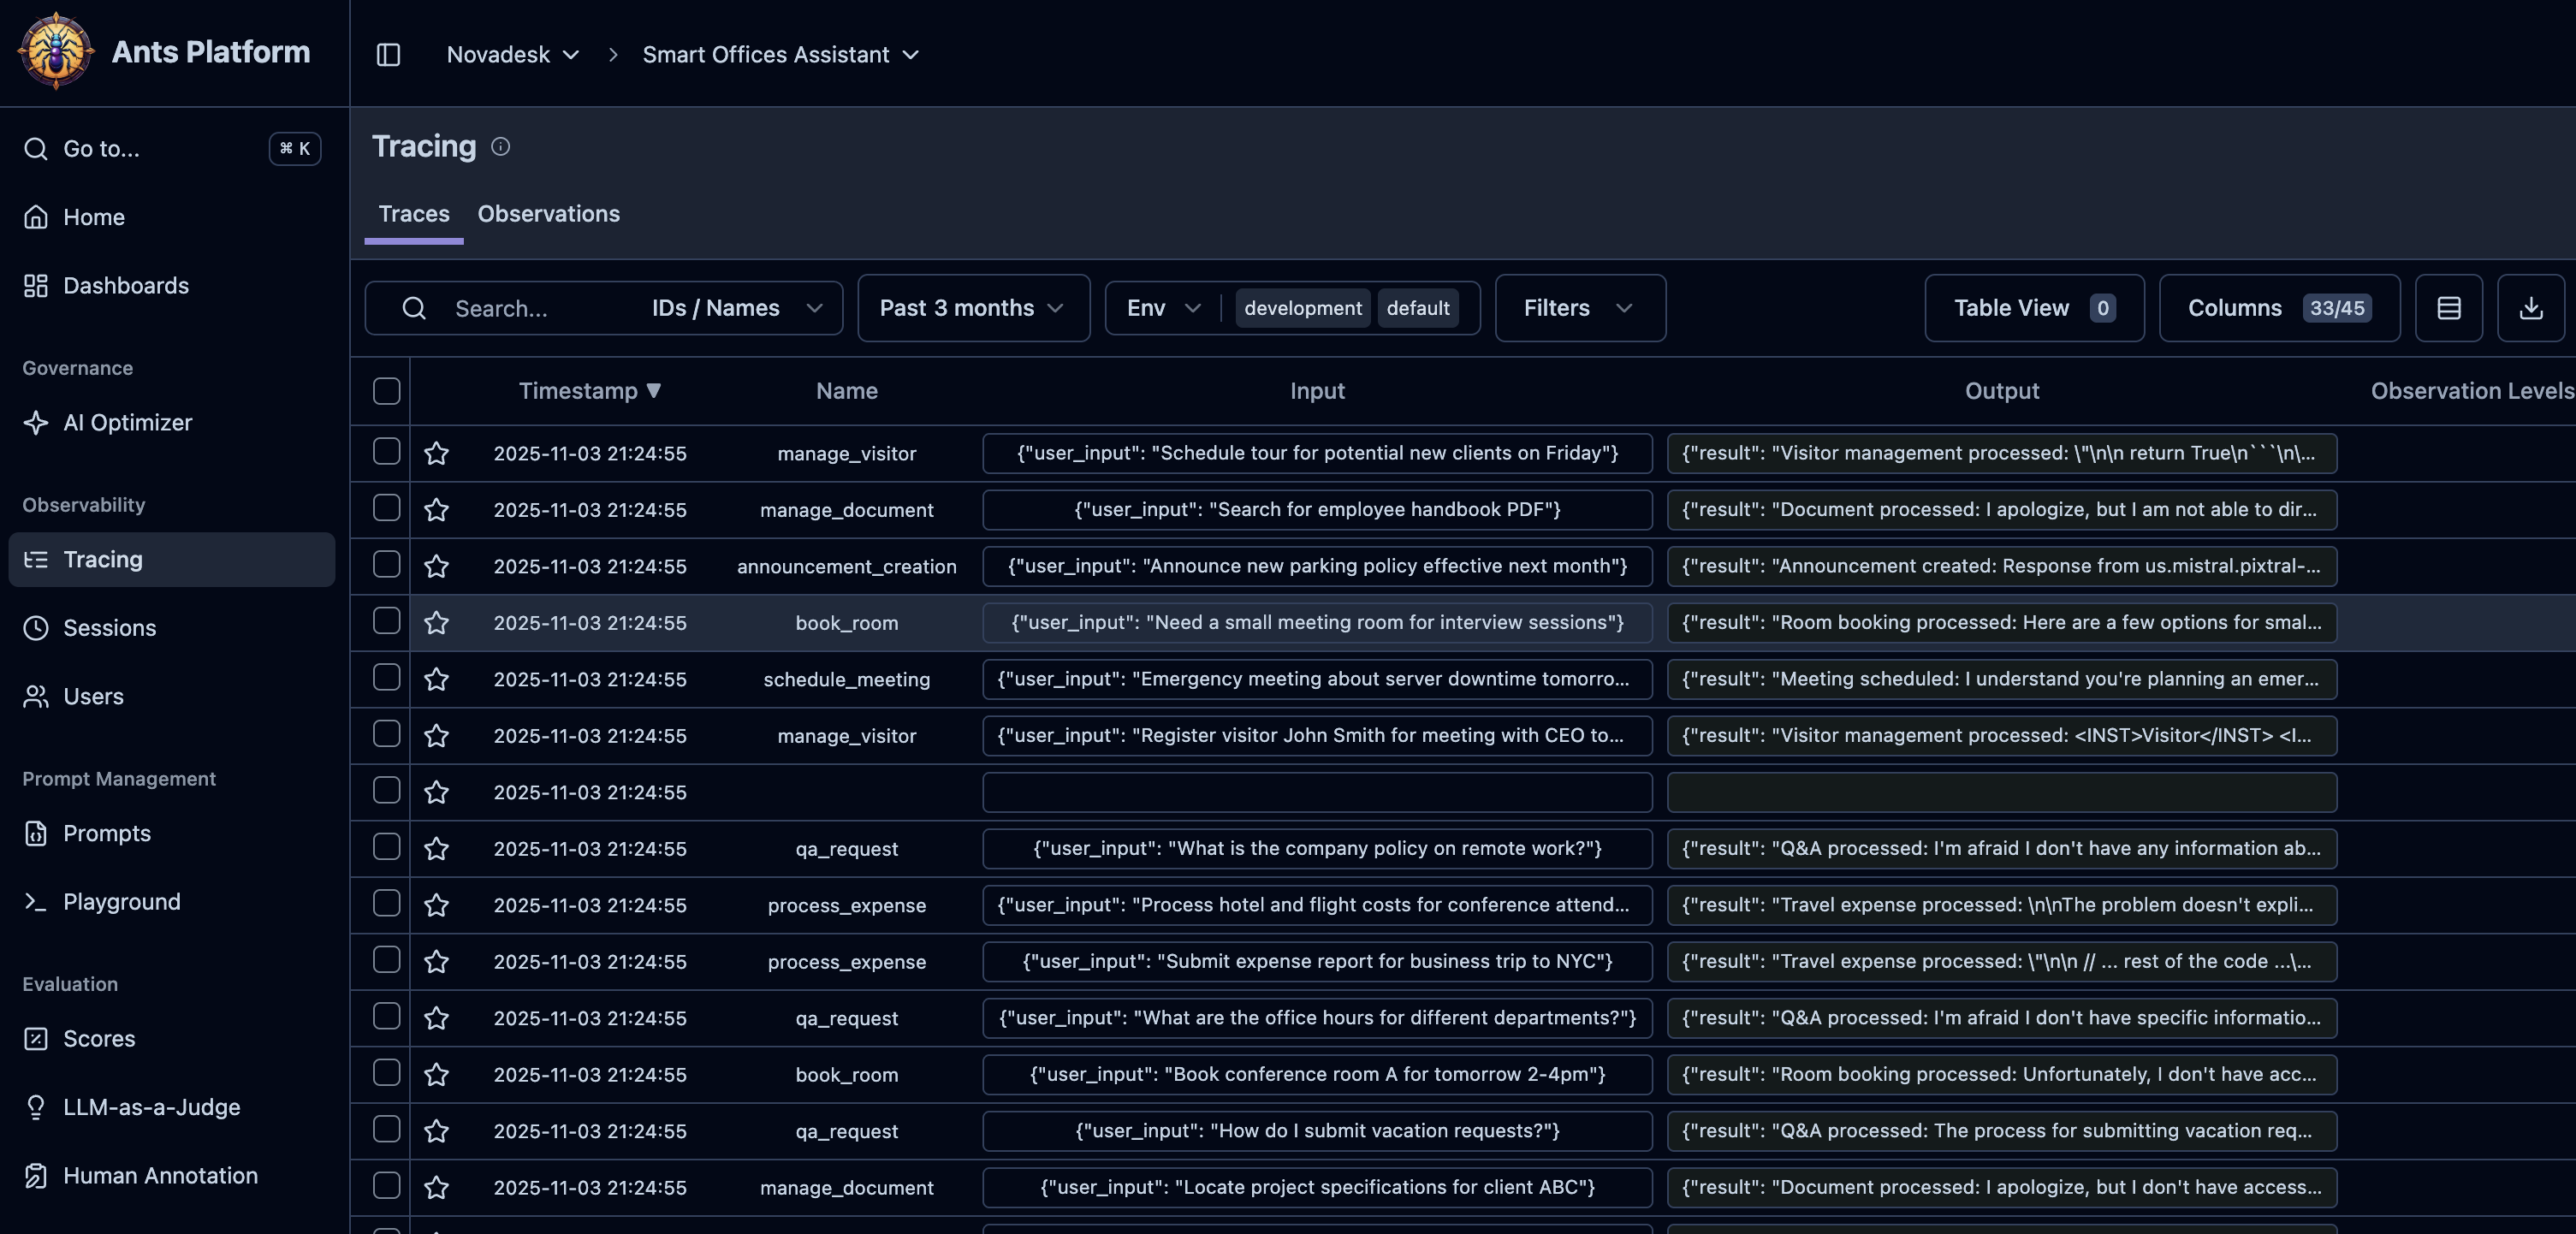
Step 7: View Your Data
- Navigate to your AgenticAnts Dashboard
- You should see your first trace appear within seconds
- Click on the trace to see detailed information:
- Input and output
- Execution time
- Token usage and cost
- Metadata and tags
** Congratulations!** You've successfully instrumented your first AI agent with AgenticAnts.
Next Steps
Now that you have basic monitoring set up, explore more features:
Advanced Tracing
Learn how to trace complex multi-agent systems with nested spans and parallel operations.
Cost Tracking
Set up detailed cost tracking and budgets for your AI operations.
Security Setup
Add PII detection and security guardrails to protect sensitive data.
Read the Security Posture guide →
Framework Integrations
Integrate with LangChain, LlamaIndex, or other AI frameworks.
Common Issues
Credentials Not Working
If you're getting authentication errors:
- Verify both your public key and secret key are correct
- Check they're properly set in your environment variables
- Ensure there are no extra spaces or characters
Connection Timeout
If requests are timing out:
- Check your network connection
- Verify firewall settings allow outbound HTTPS
- Try increasing timeout settings
Traces Not Appearing
If traces aren't showing in the dashboard:
- Verify your public key and secret key are correct
- Check the environment setting matches your dashboard view
- Verify the host URL is correct for your deployment
- Wait a few seconds - traces are processed asynchronously
- Check that your OpenTelemetry provider is properly registered
Need Help? Join our Discord community or email support@agenticants.ai
Example Projects
Check out these complete example projects:
- Customer Support Bot - LangChain + OpenAI integration
- Code Assistant - Multi-agent system with tool usage
- Document Q&A - RAG system with LlamaIndex
- Data Analyst Agent - AutoGen integration with code execution